This guide teaches the basic use of Kaltura Capture
1. Log in with your HAKA credentials at video.laurea.fi

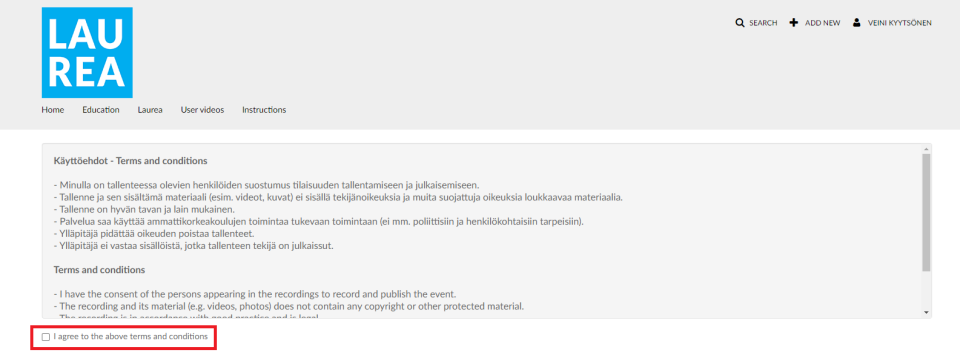
2. Select “Add New” and “Kaltura Capture”

3. Accept the terms of use
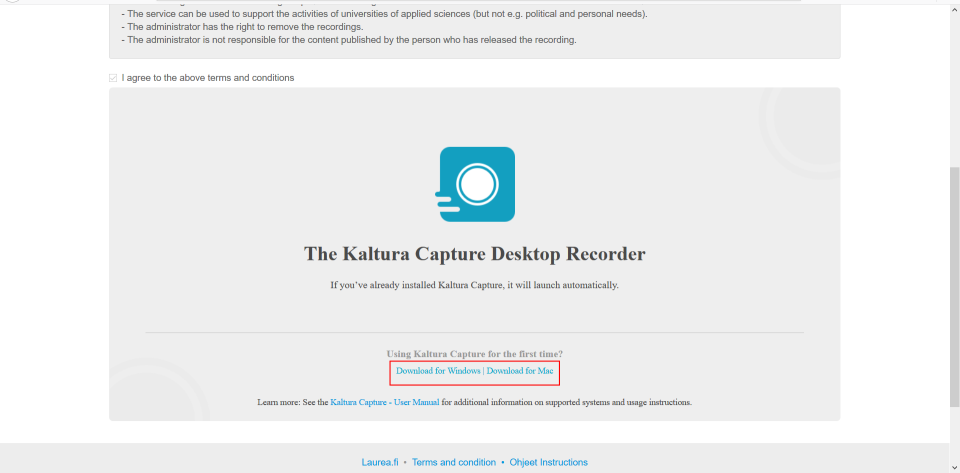
4. Download and install the Kaltura Capture application on your computer
If you already have the application installed, it will open automatically at this stage. You do not need to download and install it again.
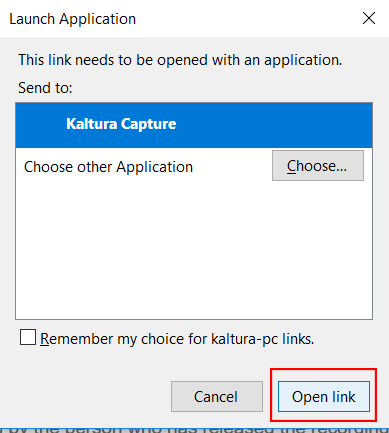
5. Wait for the browser to open the Kaltura Capture application, or open it yourself from your computer
If you allow the application to open via the browser, open the window shown at the bottom of the browser. Press the “Open Link” button to open the Kaltura Capture application.
After opening the application, the Kaltura Capture control panel will appear on the screen, and an application icon will appear in the taskbar.
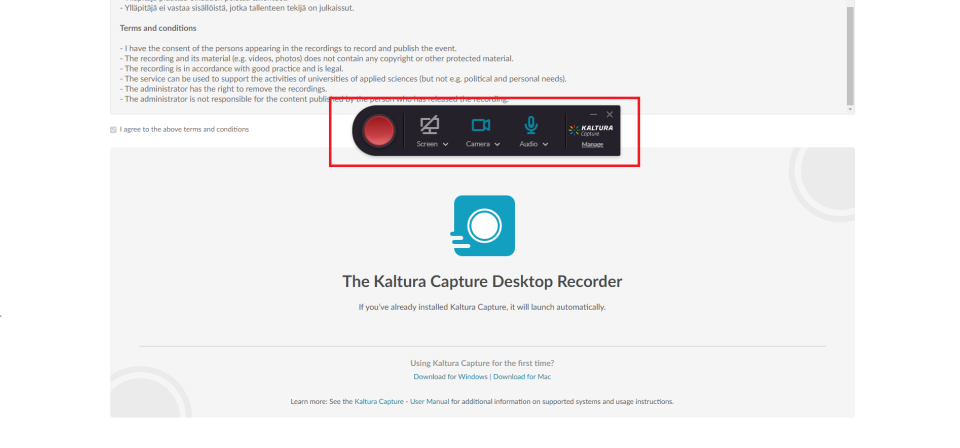
6. On your computer, go to the view (e.g. PowerPoint) from which you want the recording to start and choose your desired recording settings from the Kaltura Capture application

Recording settings can be changed by clicking them with the mouse

The computer screen view is recorded to the video (By clicking this icon you can turn the screen recording off and back on). From the arrow next to the icon you can choose whether to record the entire screen or only a portion of it.

Your webcam is recorded to the video (By clicking here you can turn your webcam recording off and back on)

The sound from your microphone is recorded to the video (By clicking here you can turn your microphone recording off and back on)

From here you can access more detailed settings and your previous recordings
7. Start the recording by pressing the large red button

This will start a countdown after which the recording begins.
During the recording you have tools related to the recording available. A red dot is displayed in the application’s taskbar icon when the recording is in progress
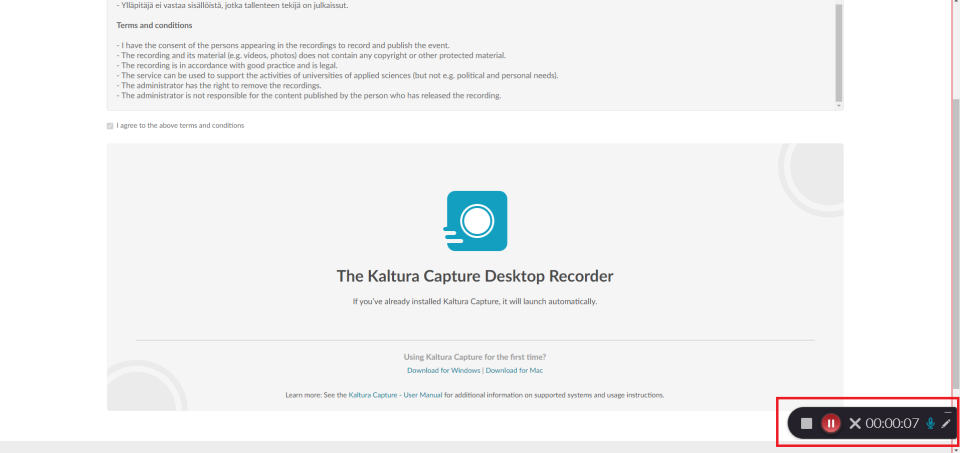
Note! The toolbar is visible and is recorded on the video during the recording. If you want to hide it, press the toolbar’s hide button
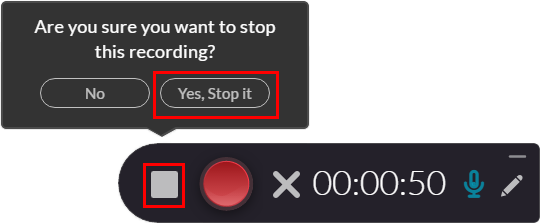
8. After recording, press the toolbar’s “Stop the recording” square
9. Give the video a title and description. Save the video either to the Kaltura Capture application using the “Save” button or directly to video.laurea.fi using the “Save & Upload” button
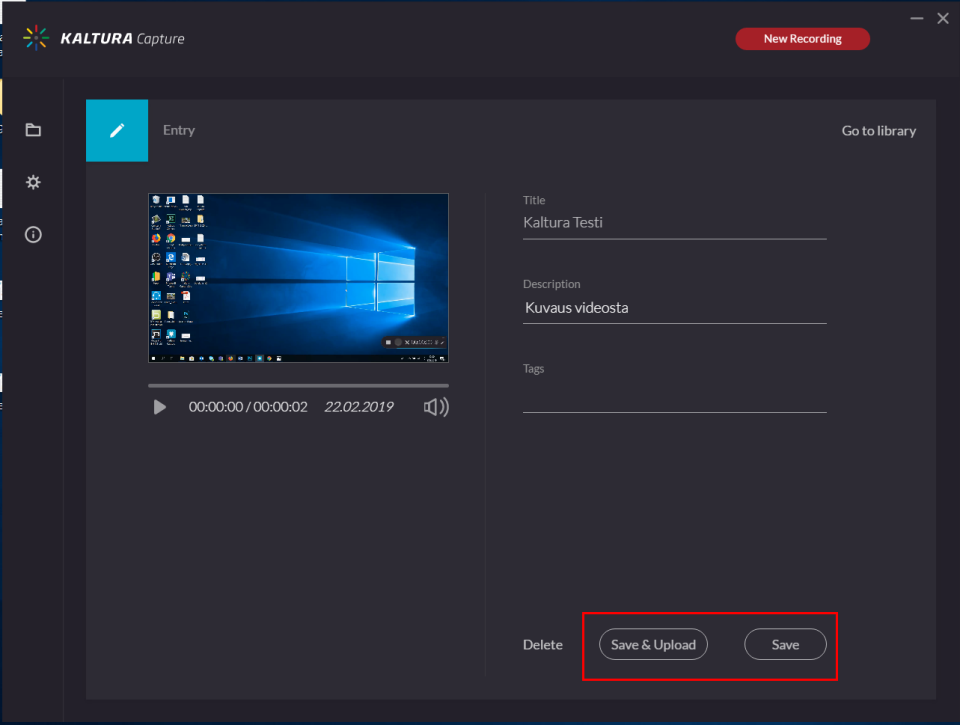
Your video will be saved to your own video.laurea.fi account if you chose “Save & Upload”.
NOTE! Videos uploaded to the video.laurea.fi pages are private and must be published separately through your user account on video.laurea.fi. More about this in section 9.
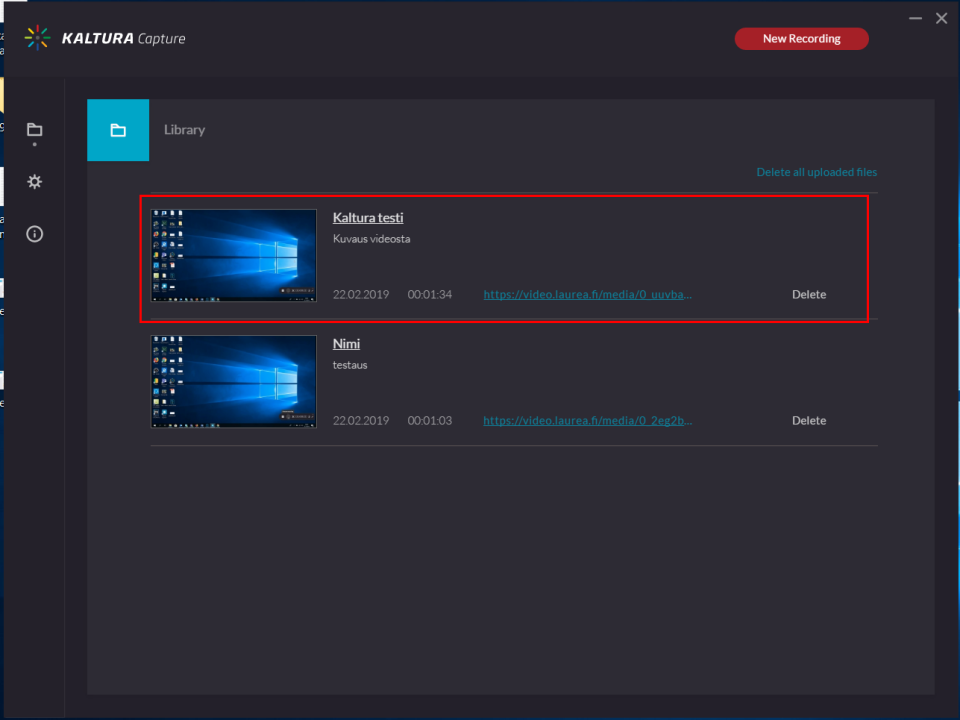
All saved videos can be found in the Kaltura Capture application’s “Library” section

10. Go to the video through your video.laurea.fi profile, or by clicking your video’s URL in the Kaltura Capture application’s “Library” section

11. Publish your video by selecting “Publish” from the “Actions” menu under your video
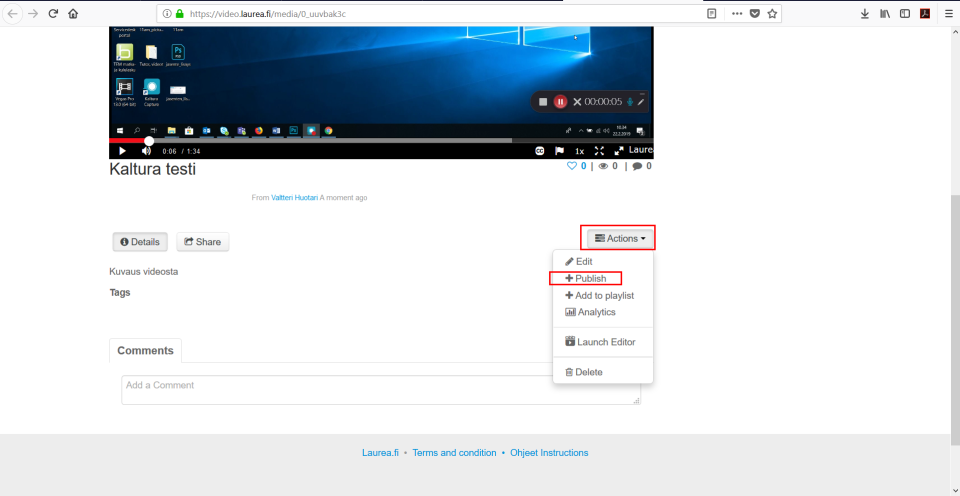
If desired, you can edit your video by selecting “Launch Editor” from the “Actions” menu
NOTE! After editing, it is advisable to save the video as a copy of the original using the “Save a Copy” button. This prevents the original video from becoming corrupted or disappearing. Kaltura’s editor has sometimes corrupted videos after editing (especially long videos).
Through the “Publish” button a menu will open under your video where you can decide how your video appears on the video.laurea.fi website.
- Private – The video is visible only to you
- Unlisted – The video is visible only to people with whom you share the video’s shareable link
- Published – The video is publicly visible on the server to Laurea members and also outside Laurea
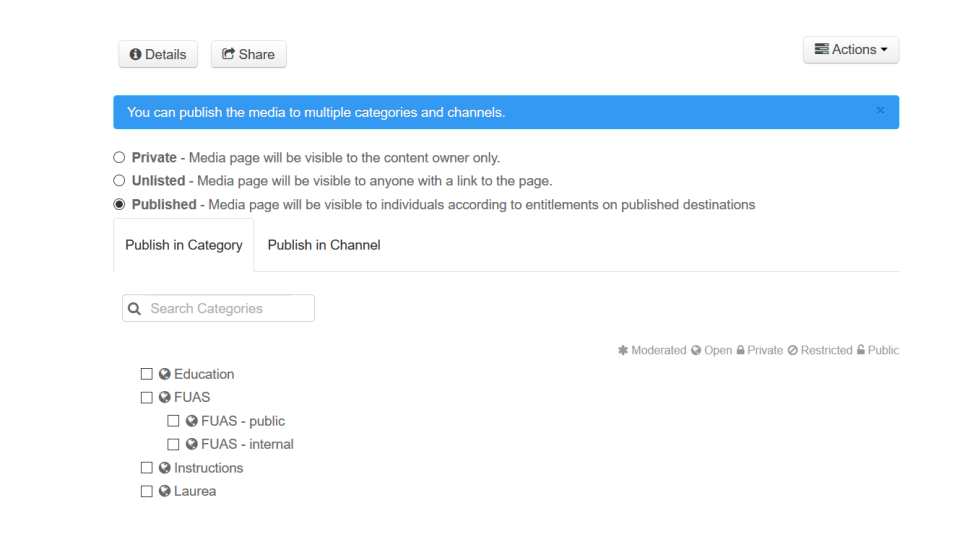
After you have selected your desired publication mode, press the “Save” button.

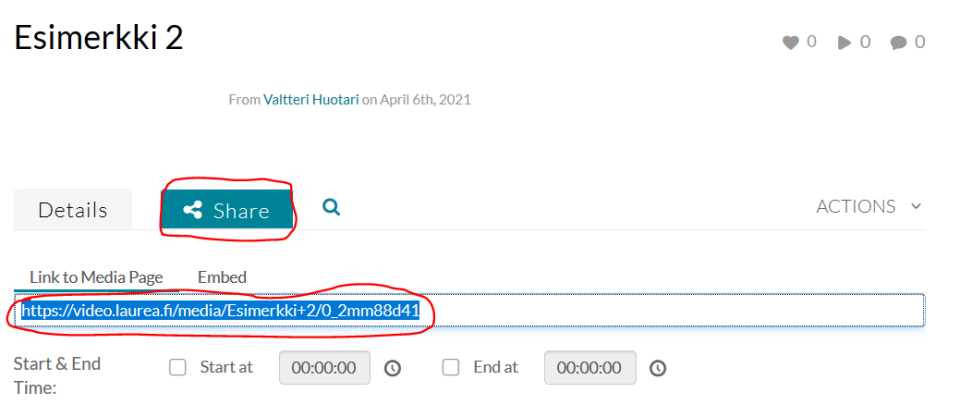
After saving, you will find your video’s shareable link on the video’s preview page under the “Share” button.